Custom mold development is the foundation of full OEM eyewear manufacturing. When a brand wants a frame that does not exist in any factory catalog — a unique silhouette, a proprietary bridge design, a signature temple shape — the manufacturer must create dedicated production molds.
This article explains every stage of that process. Most independent eyewear brands interact with molds only once: when they move from Light Custom (modifying existing frames) to Full OEM (creating original designs). Understanding what happens between your sketch and the first prototype helps you communicate better with your factory, budget accurately, and avoid costly revisions.
What Is an Eyewear Mold?
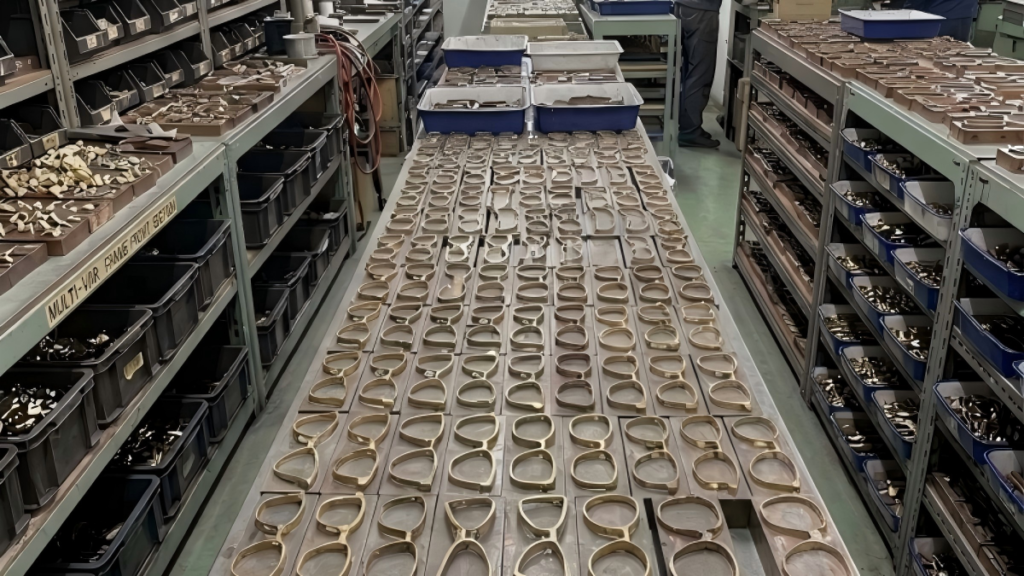
An eyewear mold is a precision-machined metal block — typically steel or aluminum alloy — that defines the exact shape of a frame component. A single frame style requires multiple molds:
| Mold | Purpose | Material |
|---|---|---|
| Frame front mold | Defines the outer silhouette, nose bridge curve, and lens opening shape | Steel |
| Temple mold (left + right) | Defines temple shape, curvature, and hinge connection point | Steel |
| Temple tip mold | Defines the acetate or rubber tip that covers the temple end | Aluminum |
| Hinge recess mold | Creates the precise cavity where the hinge sits flush | Steel |
A complete set for one frame style = 4-6 individual molds. Each mold costs $400-$800 to produce, depending on complexity. Multi-component frames (acetate front + metal temples, or layered designs) may require additional molds.
Stage 1: Design Review and Feasibility Assessment (Day 1-3)
Before any metal is cut, the factory’s engineering team reviews your design for manufacturing feasibility.
What the factory checks:
- Wall thickness — Frame fronts thinner than 2.5mm risk snapping during CNC cutting or daily wear. Temples need minimum 3mm at the hinge connection.
- Undercuts — Acetate frames cannot have negative draft angles (surfaces that angle inward under the frame). These are physically impossible to CNC-cut from a solid sheet.
- Hinge placement — The hinge attachment point must leave enough material around the screw hole. Too close to the edge and the frame will crack.
- Lens groove depth — The groove that holds the lens needs 0.8-1.0mm depth. Shallower grooves cause lenses to pop out.
- Bridge width — Nose bridge must accommodate the target demographic’s average nose width. European fits typically require 18-20mm bridge; Asian fits 16-18mm.
If you provide a physical reference frame, the factory can 3D-scan it and identify engineering issues immediately. This is faster and more accurate than working from 2D sketches.
If you provide only sketches or photos, expect 2-3 rounds of back-and-forth before the design is locked. Budget an extra week for this stage.
Stage 2: CAD Modeling (Day 3-5)
Once the design is approved for feasibility, a CAD engineer creates a digital 3D model of every frame component.
What the CAD file includes:
- Exact dimensions for every curve, angle, and surface
- Hinge placement coordinates
- Lens groove specifications
- Nose pad attachment points
- Temple curvature and length
You receive the CAD file for review — typically as a STEP or IGES format that can be opened in any 3D viewer. This is your opportunity to confirm proportions before metal is cut.
Key points to check on the CAD:
- Overall frame width (measured hinge-to-hinge) — typically 130-145mm
- Temple length — typically 135-150mm
- Lens width and height — confirm these match your lens supplier’s capabilities
- Bridge width — verify against your target market’s fit requirements
- Frame front curvature (face-form angle) — typically 4-8 degrees
Stage 3: Mold Machining (Day 5-12)
The approved CAD file is loaded into a CNC machining center that cuts the mold from a solid steel block.
The mold machining process:
- Roughing pass — A carbide end mill removes 80% of the material at high speed, creating the basic cavity shape
- Semi-finishing pass — A smaller tool refines the cavity to within 0.2mm of the final dimensions
- Finishing pass — A ball-nose end mill traces the final surface at 0.05mm step intervals, achieving the required surface finish
- Polishing — The mold cavity is hand-polished to a mirror finish. Any imperfection in the mold surface will transfer to every frame produced from it
- Inspection — The finished mold is measured on a CMM (coordinate measuring machine) against the CAD file. Tolerances must be within +/-0.05mm
Total mold machining time: 5-7 working days per frame style. Complex designs with intricate temple detailing or multi-curve surfaces take longer.
Stage 4: Trial Press and Prototype (Day 12-14)
The finished mold is installed in a hydraulic press. The first trial pressing produces the raw frame blank — still attached to the acetate sheet, with rough edges and no finishing.
This trial blank is hand-finished by a senior craftsman — CNC trimmed, barrel polished, hand buffed — to create the first physical prototype.
What the prototype confirms:
- The mold cavity accurately reproduces the CAD dimensions
- No surface defects transferred from mold to acetate
- The frame front and temples physically fit together at the hinge
- The lens groove holds a test lens securely
- The frame sits correctly on a standard face-form measurement jig
If any issue is found — mold cavity too shallow, hinge not flush, frame proportion looks wrong in physical form — the mold is returned for adjustment. This adds 2-3 days per revision.
Stage 5: Pre-Production Sample (Day 14-21)
With the prototype approved, the factory produces a small batch of pre-production frames — typically 5-10 pieces — using the same materials, processes, and QC checks as full production.
Pre-production samples confirm:
- Batch consistency — do all 5-10 frames look and feel identical?
- Color accuracy — does the acetate sheet color match your specification across multiple frames?
- Finish quality — is the polish uniform across all samples?
- Hardware fit — do hinges, screws, and temple tips assemble consistently?
Once pre-production samples are approved, the mold is ready for mass production.
Total Mold Development Timeline
| Design review and feasibility | 1-3 days |
| CAD modeling | 2-3 days |
| Mold machining | 5-7 days |
| Trial press and prototype | 2-3 days |
| Pre-production sample | 5-7 days |
| Total | 14-21 working days |
Add 3-5 days per design revision round. Complex frames (multi-material, intricate temples, unusual bridge shapes) add 5-7 days.
Frequently Asked Questions
Do I own the molds after they are made?
Yes. Once you pay for mold development, the molds are your property. You can take them to another factory, store them for future production runs, or request their destruction. See our guide on mold ownership for details.
What happens if the prototype doesn’t match my design?
The mold is adjusted or re-machined at the factory’s cost if the error is on their side. If you change the design after CAD approval, revision costs apply.
Can I use the same mold for different acetate colors?
Yes. The mold defines shape, not color. You can produce the same frame in black, tortoiseshell, and crystal from one mold set.
How long do molds last?
Steel molds last 10,000+ pressings with proper maintenance. Aluminum molds (temple tips, smaller components) last 5,000+ pressings.
Can I develop molds without placing a large production order?
Minimum production order after mold development is typically 300-500 pieces per style. This covers material prep, production line setup, and QC labor.
Contact us to discuss custom mold development for your brand →